How to setup load balancer with Elastic file system (EFS) in AWS? Part 2
5 min read. Apr 18, 2022
Hello folks, in this second part of the article of configuring load balancer with EFS, we’re going to configure a virtual private cloud and create subnetworks for the load balancer and servers behind it. A virtual private cloud helps to provide multiple layers of security by allowing us to enforce the access control list (ACL) on the subnetwork and security groups on the elastic load balancer and EC2 instances as I mentioned in the last article.
The minimal configuration of the load balancer requires at least two EC2 instances in different availability zones for availability and scalability of the application. Similarly, AWS docs suggest creating at least one public subnet on each of the availability zones for the load balancer. Apart from that, we also need to create two private subnets for the two servers (EC2 instances) which serve the request for incoming traffic on the load balancer.
To sum up, we need to create a VPC with two public and private subnets.
Setup VPC and subnet
In order to get to the VPC configuration wizard, you can either type “VPC” on the search bar or select VPC from the Services > All Services on the AWS dashboard. Then, click on Create VPC on the navigation pane.
The following provides a summary of the steps from the AWS docs to configure VPC and subnets:
- Select VPC, subnets, etc. from the resource creation radio-options.
- Give a meaningful name to the VPC.
- Enter 10.0.0.0/20 in the IPV4 CIDR block for the VPC. This gives us 4096 IP addresses and it should be more than enough to be divided between 4 subnets as AWS recommends only a minimum of 8 free IP addresses on the public subnets where the load balancer resides.
- Default options should be fine for the rest of the fields.
IPV6 CIDR block: No IPv6 CIDR block Tenancy: DefaultAvailability Zones (AZs): 2Number of public subnets: 2Number of private subnets: 2Number of public subnets: NoneVPC endpoints: S3 gatewayDNS options: Enable DNS resolutionLastly, click on the Create VPC button to create VPC and subnets.
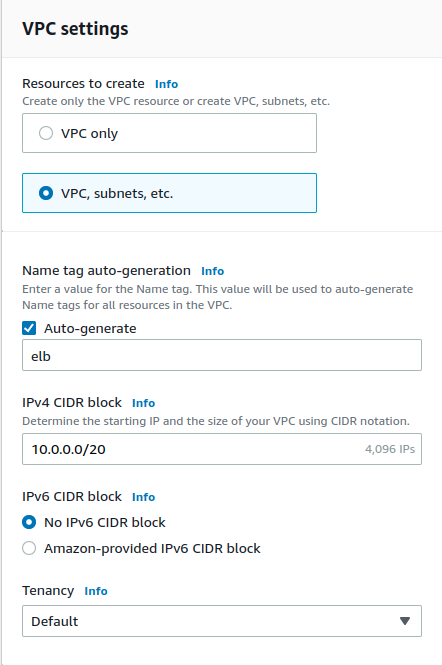
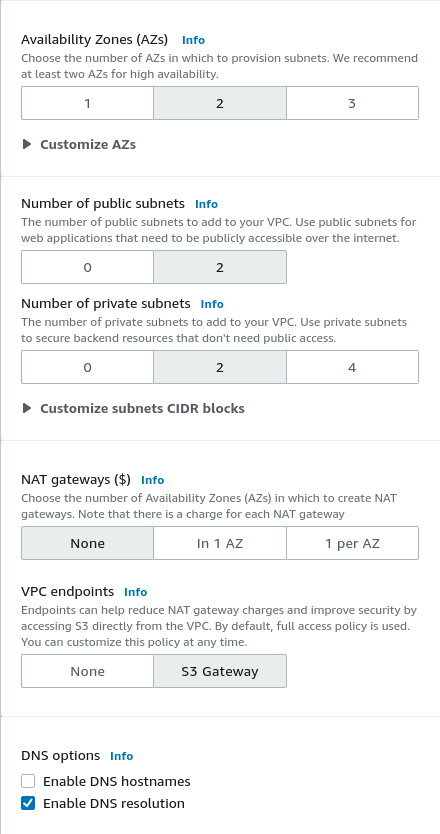
Image: Screenshot of VPC and subnets configuration wizard
As you can see in the below screenshot, AWS evenly divides the IP addresses to each of the subnets within the VPC. Similarly, the two public subnets, which are connected to the internet gateway share the same route table, however, each of the private subnets has a separate record on the route table.
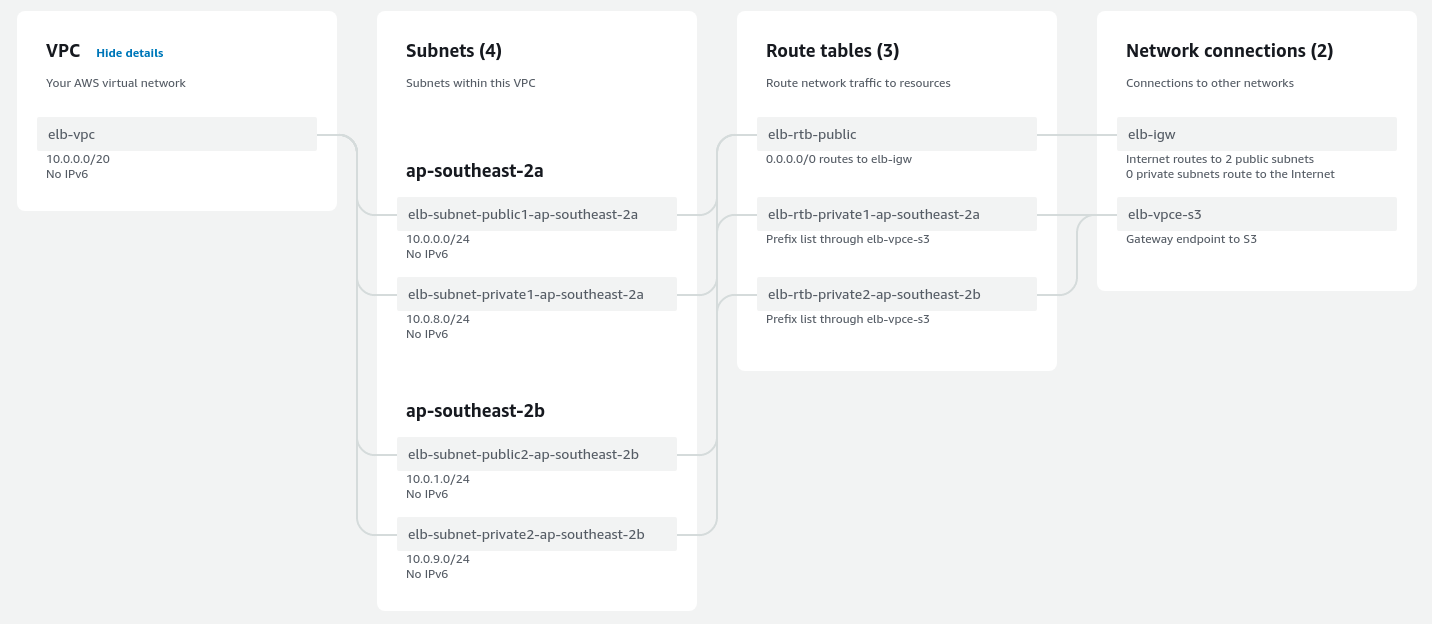
Image: Preview of subnets, route tables and connections in VPC
Wrapping up
The steps to create VPC and subnets are quite straightforward on the AWS management console. In addition, AWS provides a fancy real-time visualization of subnets with associated route tables and network connections while creating VPC.